Anatomy of a Basic Go Program
I’m going to do my best to remember what it is like starting out with something new, specifically programming. In the hope that I can cover what is important in enough detail that you can learn from it. But also, not so complex that you just get overwhelmed. But first, I’m going to assume you’ve looked over the previous post, and have set up your environment, if not check it out here.
Feb. 10, 2024 1420 words syntax ·
I’m going to do my best to remember what it is like starting out with something new, specifically programming. In the hope that I can cover what is important in enough detail that you can learn from it. But also, not so complex that you just get overwhelmed.
But first, I’m going to assume you’ve looked over the previous post, and have set up your environment, if not check it out here.
I’m also going to assume that you are you proficient in the basic operation of your chosen computer Operating System. If not, you’ll need to spend a little bit of time refreshing your self on navigating file structures, creating new directories, and opening up your command line interface. (It might sound a bit scary, but the command line is the best friend of a programmer. It will take some getting used to it, but once you have you’ll have much more speed and power at your finger tips.)
Since I run Linux (and honestly, you should too, it is the lingua franca of the internet as most of the internet traffic is run on linux servers), I’ll show some basic Linux commands, but they are mostly portable to windows, or spending some time googling can get you up to speed with these basics.
Getting Started
Before we get started with the actual code, we need to get some ground work done, so you have something that will work.
Step 1: Create your directory
You’ll need to create a directory for your game/program. I guess a prerequisite of this, is have a name for said game/program. Today, since we’re not to game development yet, we’ll have a program aptly named “Intro”.
So, open your command line interface of choice, and create that directory. (This can also be done in your file browser of choice, but we’ll be in the terminal/cli/command line interface in a minute any way. So jump in.)
Linux && MacOS && Windows
mkdir Intro
Step 2: Create a go module project
First off, what is a go module? A go module is the go programming language method for collecting the source code you write, and any dependencies you may include into your project, into one cohesive project.
You’ll need to move to the directory that we just created (you’re using the command line right? Right?).
Linux && MacOS && Windows
cd Intro
Great, now we’re in the correct directory. From here we will create the go module.
Linux && MacOS && Windows
go mod init intro
This command has a few parts:
- Go -> this is the go compiler tool chain that can work with you operating system.
- mod -> This is telling the go tool we want to work with the module system.
- init -> We’re telling the go’s module system we want a new module created.
- intro -> This is the name of our new module
This command will create a new file in our directory that we created and moved into. It will look something like this.
module intro

go 1.22.0
Right now, our module file is very basic. Just the project name, and the go version we want to use. (It will get a bit more complex later, but we’ll get there when we get there yeah?)
Step 3: Our first go source file
Now we’ve got the foundation of our program started. We have the directory our source code will be in, as well as the go module started. Now is the time that we’ll start seeing some code.
I know I’ve talked a bunch about using your terminal or command line interface to get to this point. But now, we can get started using our editor, that was talked about in the previous post here. Make sure that you’ve got that editor we talk about there installed and the go plugin installed as well. (You may ask why the editor now and not the command line? Well there are some command line editors that work well enough, but they are a steep learning curve. So for a smaller learning curve, you can get syntax highlighting you’ll love this, and code completion which is super awesome).
Once that is done, you can open up the directory we just created in that editor. Now create a new file from the editor (not sure how to do this, you’ll have to poke around and learn by doing). This file needs to be named main.go (not all of your file swill be called this, but this will help you identify where you created the function that the operating system uses to start up your application).
You’ve created your file, yeah? Great, but now what do you put in it? Well, now we’re ready to start talking about the anatomy of a go program.
Time for code
Great, we’ve got the ground work out of the way. We can start talking code.
We’ll start by looking at the overall code before discussing it in more detail.
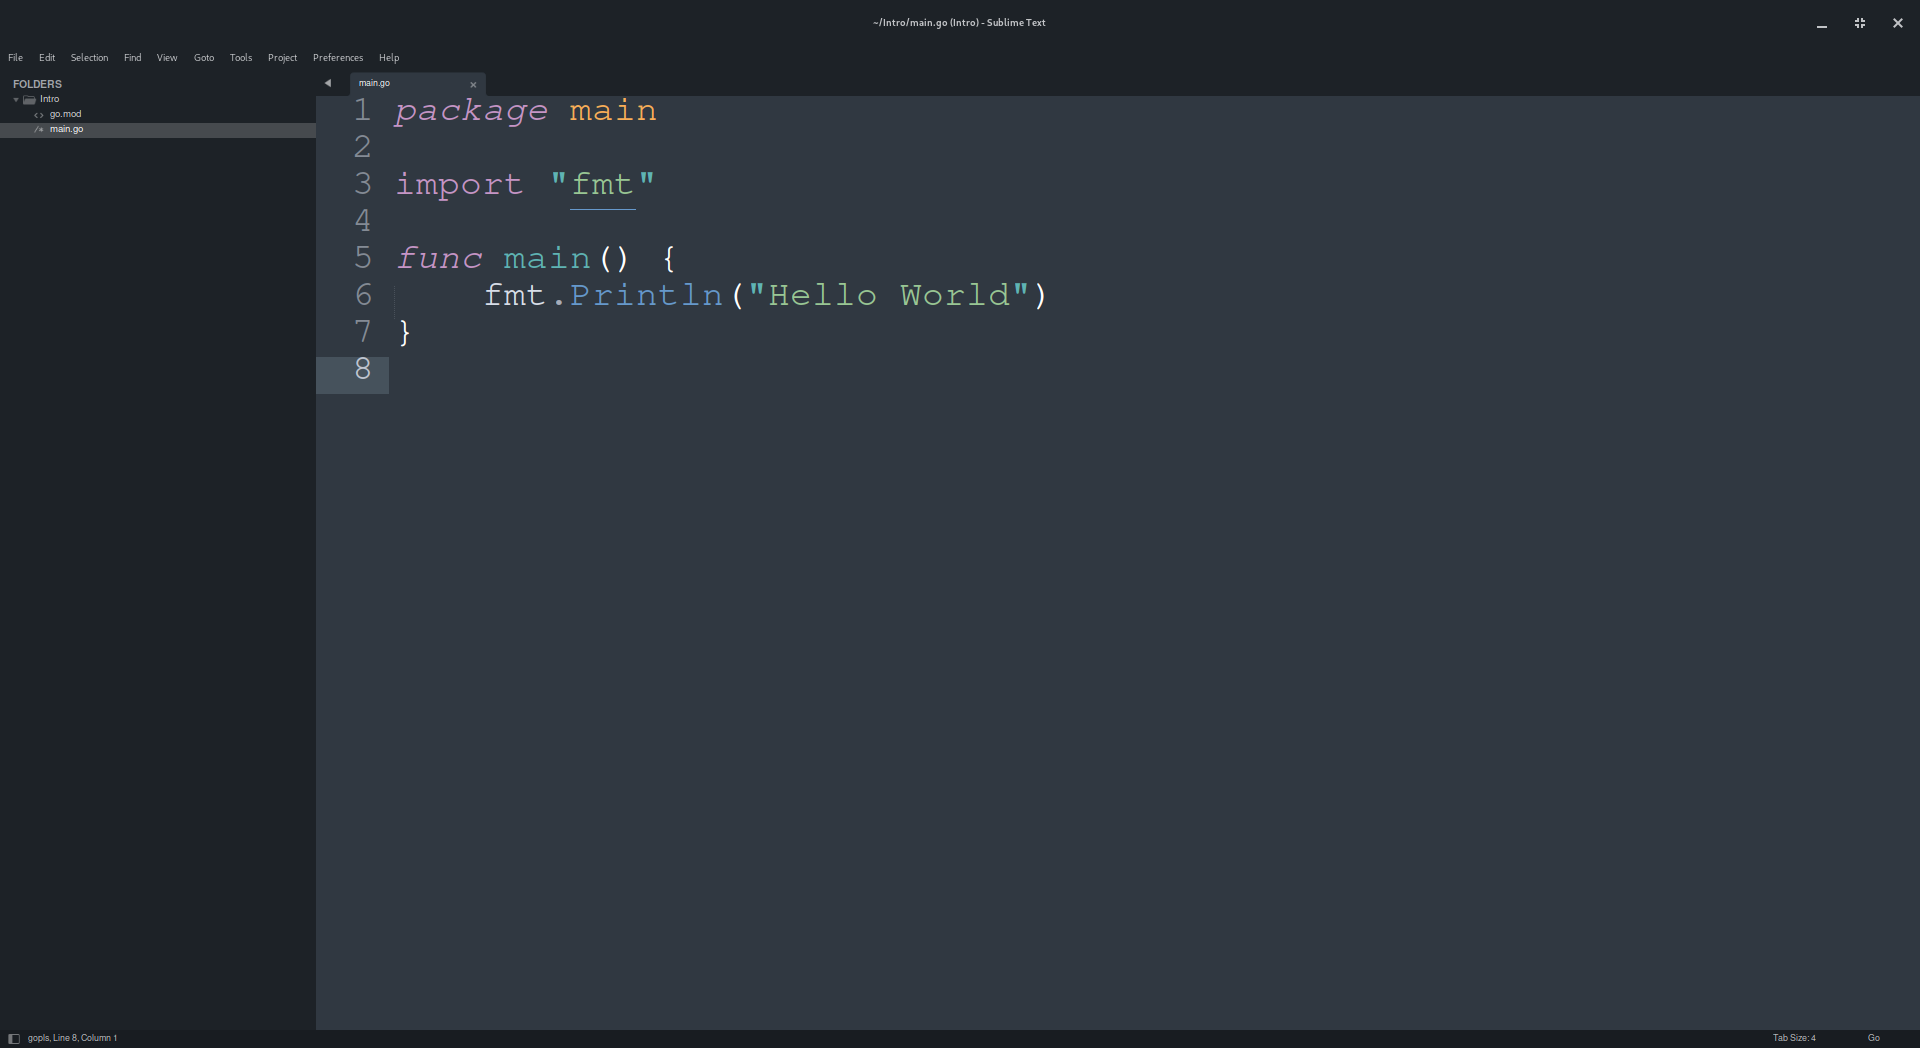
// Intro this is a package level comment. Comments are denoted by the double slashes.
package main

import "fmt"

func main() {
	fmt.Println("Hello World")
}
There is a lot of complexity that is wrapped up into this simple code above. I don’t think that we’re going to cover all of it here. But we’ll glance over what is going on.
// what is a comment
Sometimes there are parts of your code that you want to put, well, comments in. This is normal language, that explains something. And in the case of go, we can generate godocs from them, which gives us the ability to document how our code works and let others see and understand better.
There are two types of character sequences that start a comment. This style starts with the two slashes. (By the way, they are not forward slashes, because you have to have a normal slash to have a back slash. Therefore they are just slashes.)
The other style is /* followed by */ at the end of the comment. These are multi-line comments.
package main
This line tells the compiler that this is where the pain code for our application will live. And that the compiler will eventually find our main entry point.
import “fmt”
There is a lot required to get a program working. Fortunately for us, we can build upon the backs of libraries. In this case, this is part of the standard library. The import part is what is important in this instance. It is this call that tells the compiler we want to include some extra code into our program.
The “fmt” part, is the specific part of code that we are including. This is used to help output and input. You can read more about it when you have the time.
func main() { }
This is a function call. A function is what allows us, as programmers, to separate our code into different units. But this one is a special function.
The main function is then entry point to the program. (This is one of those technical parts. But the compiler will compile the code. Then something happens called linking. The linker takes the compiled output that turns it into an executable binary, the main function is what the linker needs to get the Operating System tied into our program).
fmt.Println(“Hello World”)
This is what our program actually does (at this point). It calls a function defined in the fmt package, Println. This particular function call prints the parameters that are passed to it when it is run.
I’m sure this is a lot digest at this point, functions are a big topic of themselves. But for now, this is what we’re going to cover.
Great, I have my program written now what?
Here is where you can run your program. There will be another discussion about this later, but for now we’ll cover the simplest method to get it running.
So, jump back into your terminal/command line and you can run you program like this.
go run .
Like before, you’ll see that we’re using the go command. We’re invoking the run option. And the ‘.’ tells it to run the go code in the current directory.
It will take a couple of seconds, and then it should write out: “Hello World” as we passed in the function call.
Congratulations
You’ve created your first program. Sure, it doesn’t do much. But now you have some foundations in place to get start learning and doing even more.